CopernNet : Point Cloud Segmentation using ActiveSampling Transformers
In the dynamic field of railway maintenance, accurate data is critical. From ensuring the health of ...


Published on: March 26, 2019
This manual will walk you through the installation of Ubuntu with a working CUDA setup on a Dell XPS15. We start from a Dell shipped with Windows and we use a Dual boot system.
Note that you will need internet access for both the Windows and the Linux setup. First, complete the Windows installation.
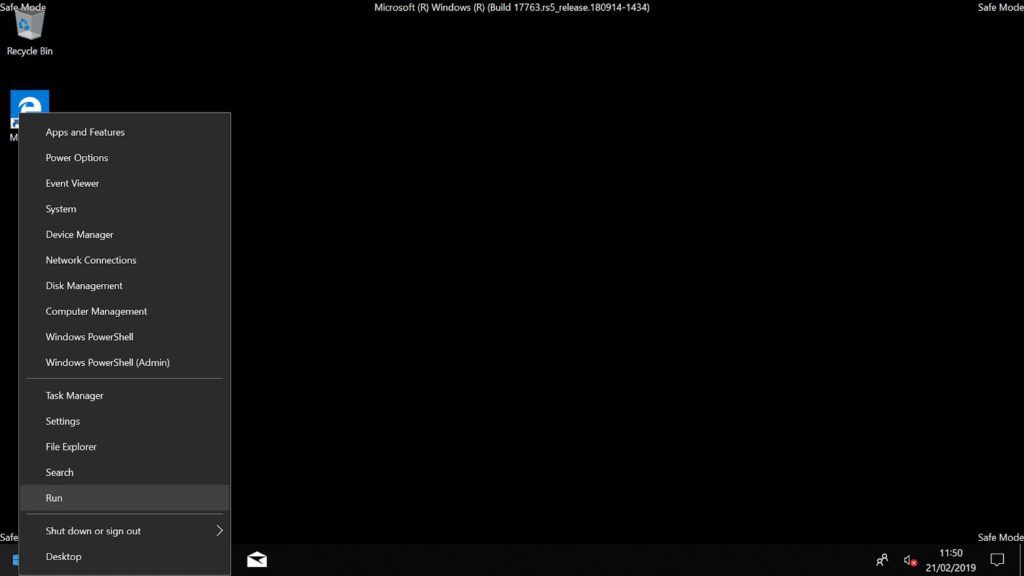
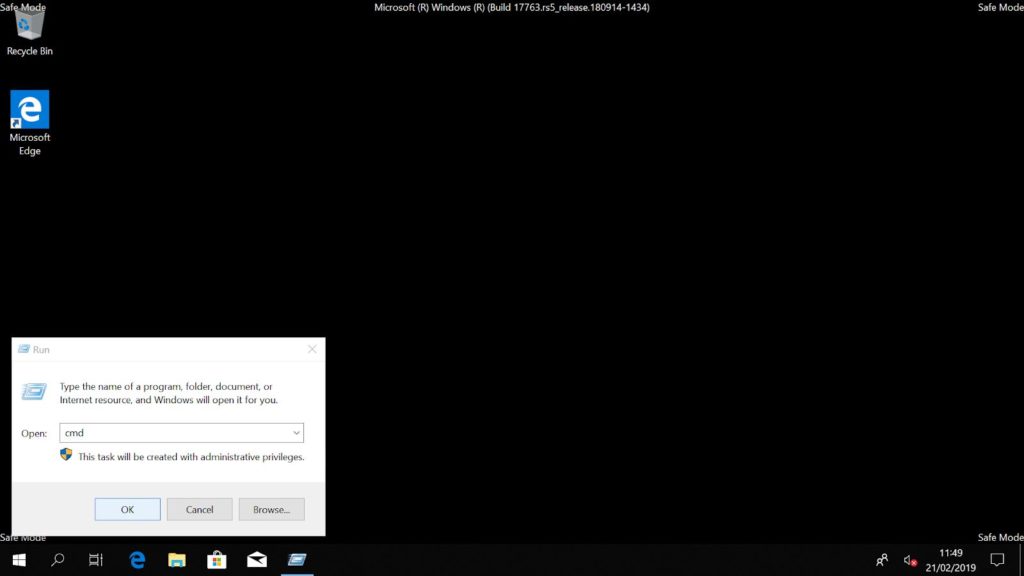
Then, set up safe mode in Windows:

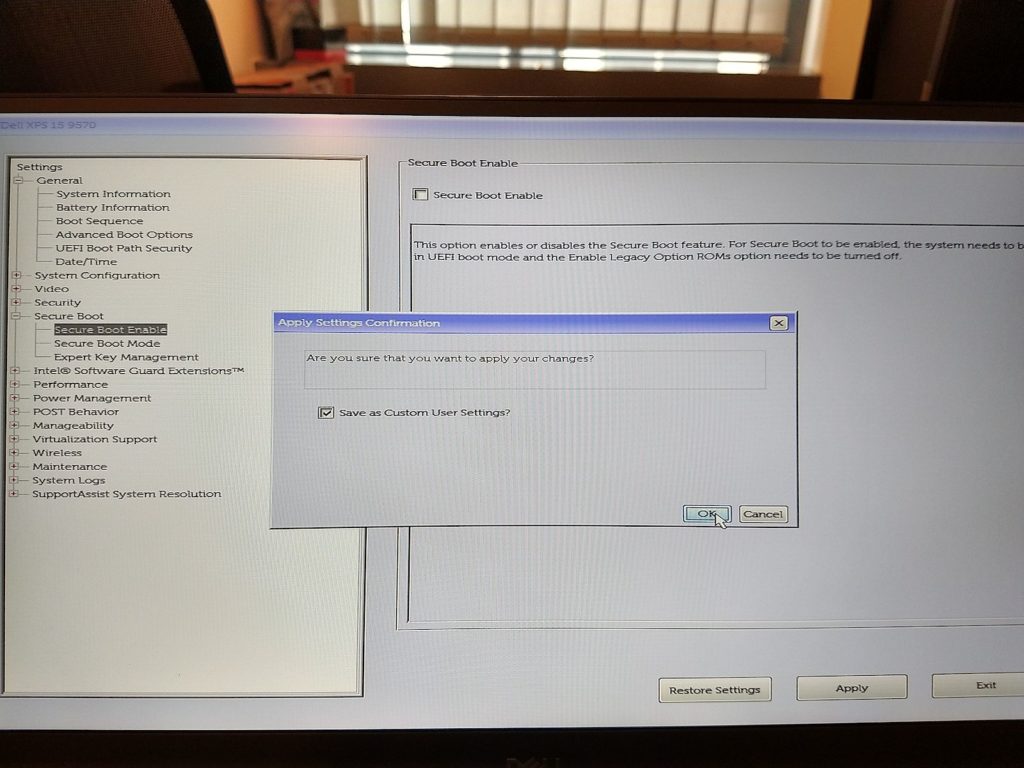
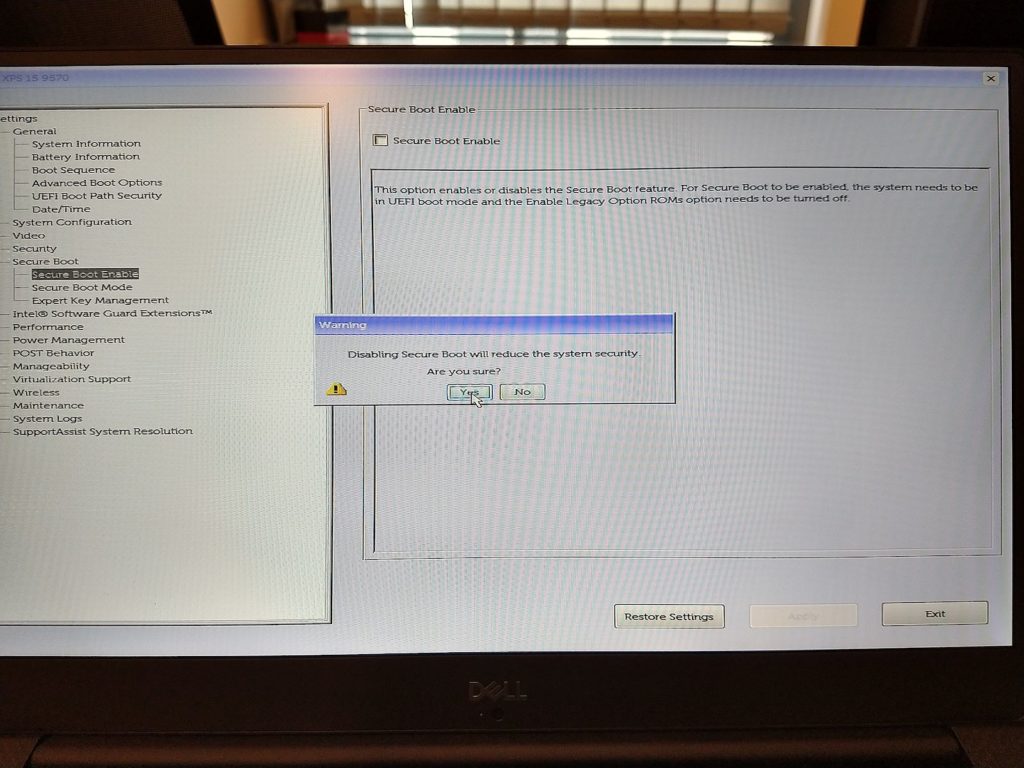
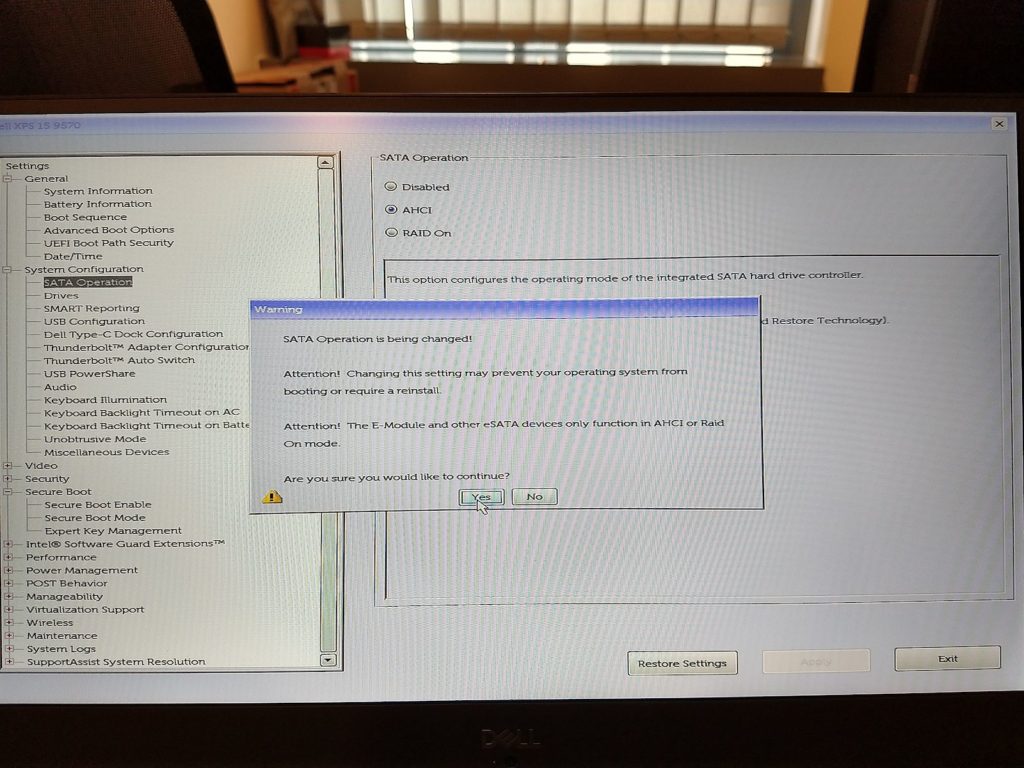
Also disable encryption:


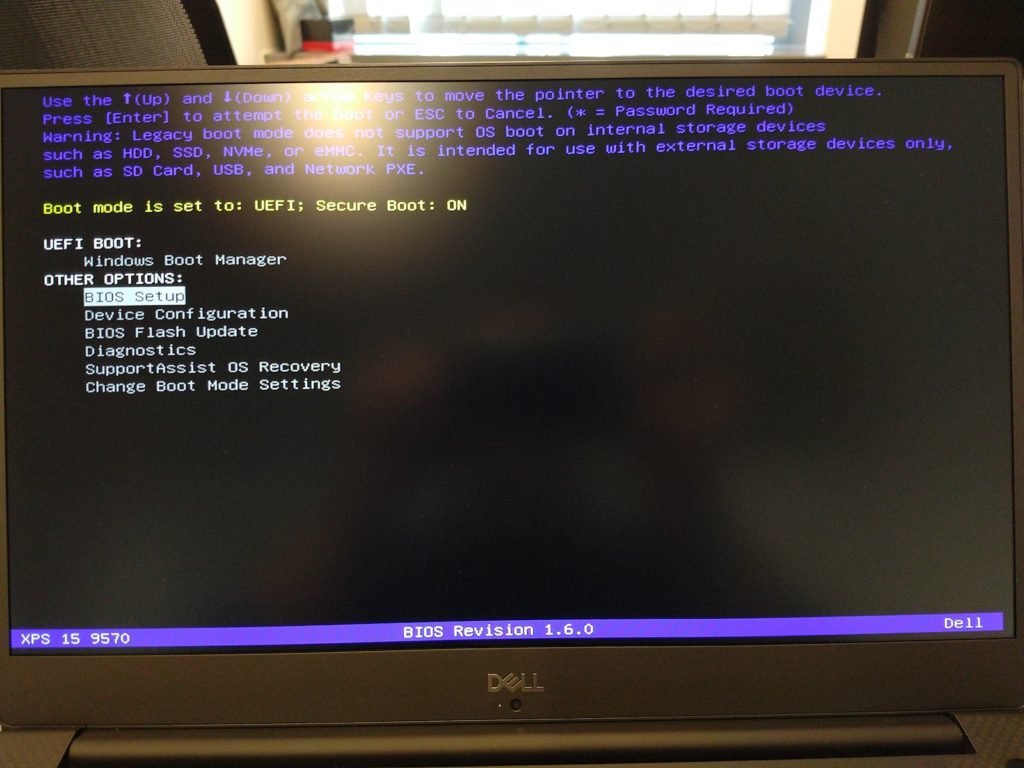
Then wait a minute and reboot in setup (hit F12 while booting). Note that setup does not support the touchpad very well, so either connect a mouse or use a keyboard.
Save and exit and go back to Windows.
Then, disable safe mode in Windows:

Insert the Ubuntu 18.04 USB disk and reboot again. Hitting F12, so you can choose to boot from USB. It is possible that the Linux boot loader will not show anything on the screen. If that is the case (screen remains blank), just hit enter. If you install Linux, better choose “try Ubuntu” (This allows you to start the installation and still browse the internet during the installation).
Then choose “minimal installation” (so you can select the software) + “install-third party software” (so that it will install the NVIDIA drivers).
Then you should be able to install Ubuntu alongside Windows (if not, you didn’t disable encryption succesfully).

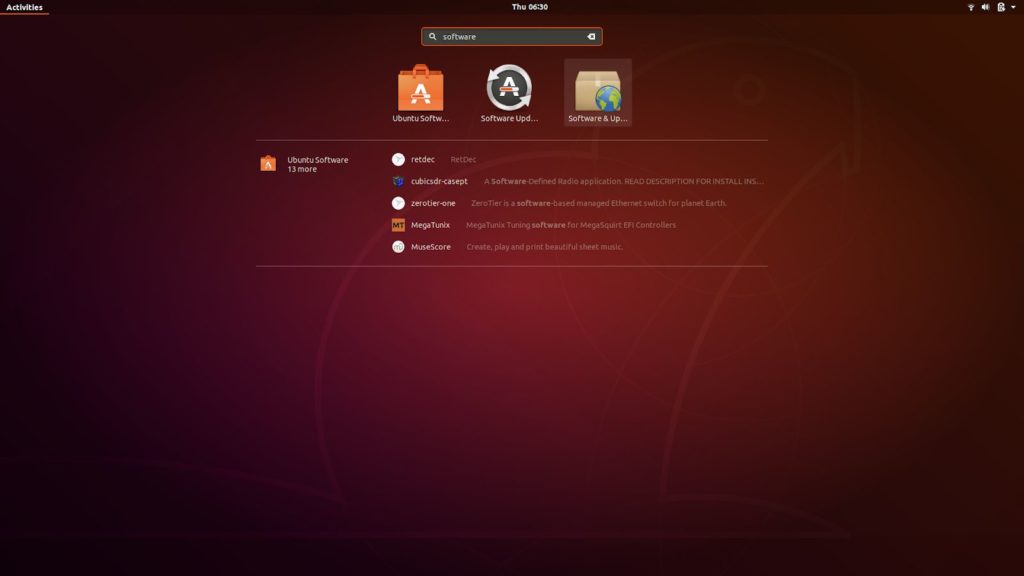
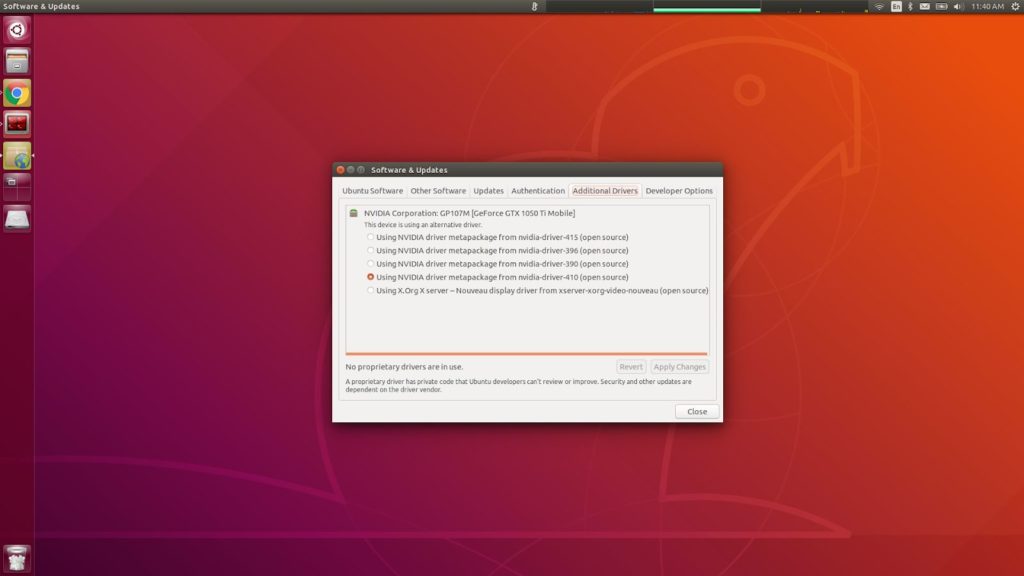
In Linux, open the start menu, type “software & updates” and open it. Then go to the “additional drivers” tab and select “using NVIDIA driver metapackage” and hit apply. Reboot the system.

Note that it is easy to switch back if you follow the same procedure. The Nouveau drivers (open source) do not offer CUDA, but they are more stable (e.g. during suspend/resume).
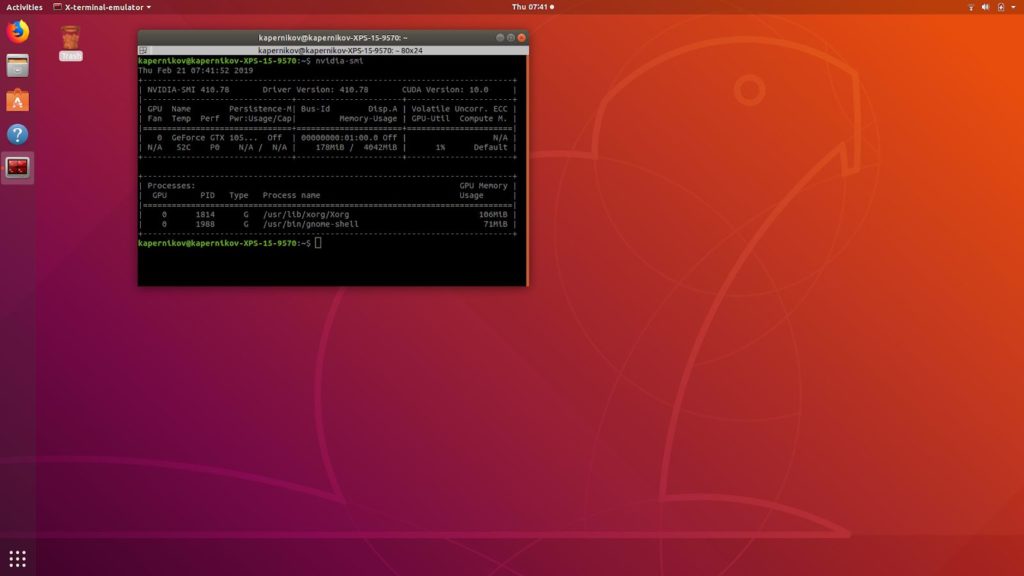
Restart the computer, and open a terminal, and type “nvidia-smi”. It should show your NVIDIA card memory and usage.
For CUDA 10 you need a newer version of the NVIDIA drivers. NVIDIA Driver 410.93 can be installed in the same way as above provided that the NVIDIA repository is added by opening a terminal and running:
sudo add-apt-repository ppa:graphics-drivers/ppa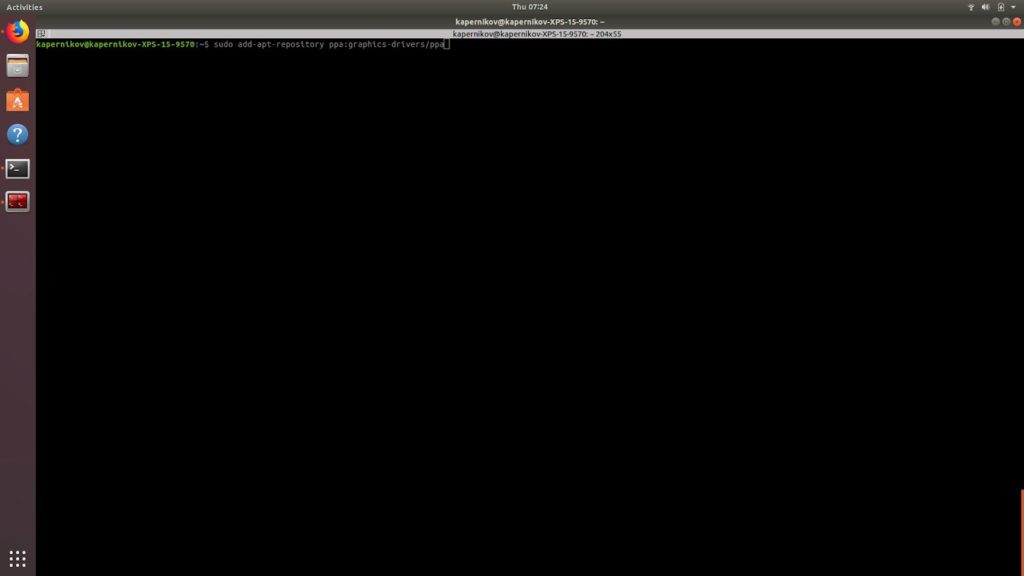

If you notice that suspend/resume no longer works after installing the NVIDIA drivers, the workaround described here worked perfectly for us. It boils down to change /etc/default/grub, so that the GRUB_CMDLINE_LINUX entry looks like this:
GRUB_CMDLINE_LINUX="nouveau.blacklist=1 acpi_osi=!
acpi_osi=\"Windows 2015\" acpi_backlight=vendor
mem_sleep_default=deep"The Intel GPU offers better battery life, so if you don’t need CUDA you can easily switch by doing (on the terminal):
sudo nvidia-select intelfollowed by a reboot
When you need the NVIDIA GPU again, you can switch back:
sudo nvidia-select nvidiaagain followed by a reboot.
You can find out which GPU is active by runnning:
prime-select queryWe did not try Bumblebee (see here for documentation) so we are not sure if it works or/and if it saves power.
You will need an NVIDIA account for the CuDNN part. Note that, in order to do custom CUDA development (nvcc), you will need to downgrade GCC to GCC 6. However, this is not needed if you just want to run keras and tensorflow. You can always downgrade GCC later on.
If you just want a pip installation of tensorflow, as of November 2018, you need CUDA 9.0. CUDO 10 is also possible if you upgrade the NVIDIA drivers to the beta version and if you either compile cuda from source or use nvidia-docker to run a dockerized CUDA.
Download CUDA 9 as runfile (.deb installation WILL NOT WORK because the provided debs for CUDA 9.0 are tailored for older versions of Ubuntu). Download the base installer and all the patches.
Then download CuDNN (login needed). Make sure you have the version that matches your CUDA version for X68_64.


sudo apt install build-essential cmake
sudo bash cuda_9.0.176_384.81_linux.run –overrid
DO NOT install the NVIDIA driver (it will request you to install the NVIDIA driver. Don’t do it).
Ignore the other warnings, but do enable the CUDA installation and symlink.
Now install the patches (4 of them) for CUDA 9.0:
sudo bash <patchfile>Now for installing cudnn: unpack the tgz file:
tar -zxf cudnn-*.tgz
sudo cp -a cuda/* /usr/local/cuda/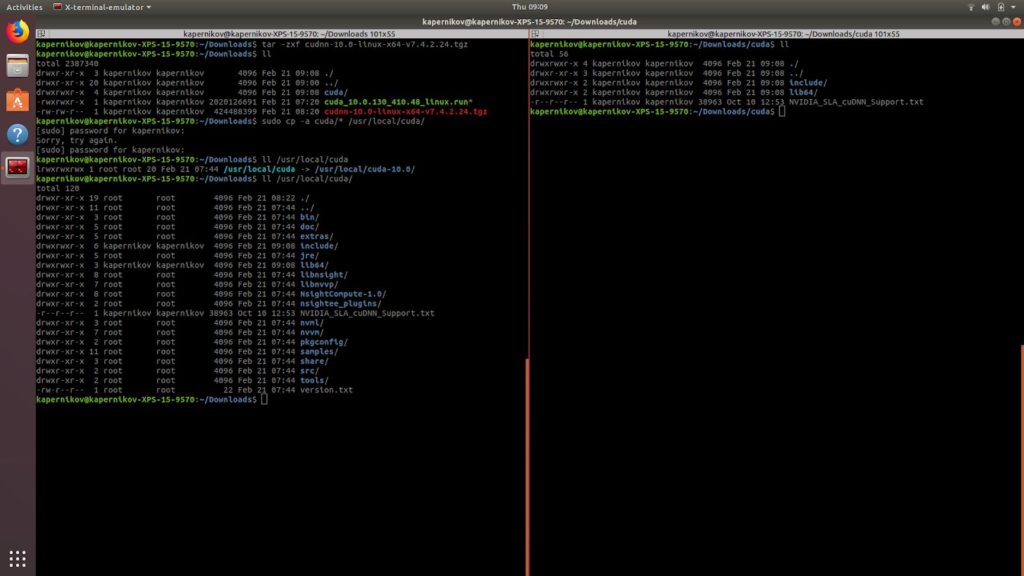
Now make sure that CUDA is seen in LD_LIBRARY_PATH and PATH:
sudo su – # become root
echo /usr/local/cuda/lib64 > /etc/ld.so.conf.d/cuda.conf
ldconfig
Add /usr/local/cuda/bin to your path (e.g. edit your .bashrc) if you want to do development for CUDA (not needed if you just need tensorflow):
echo “export PATH=$PATH:/usr/local/cuda/bin” > ~/.bashrcsudo apt install python3-pip
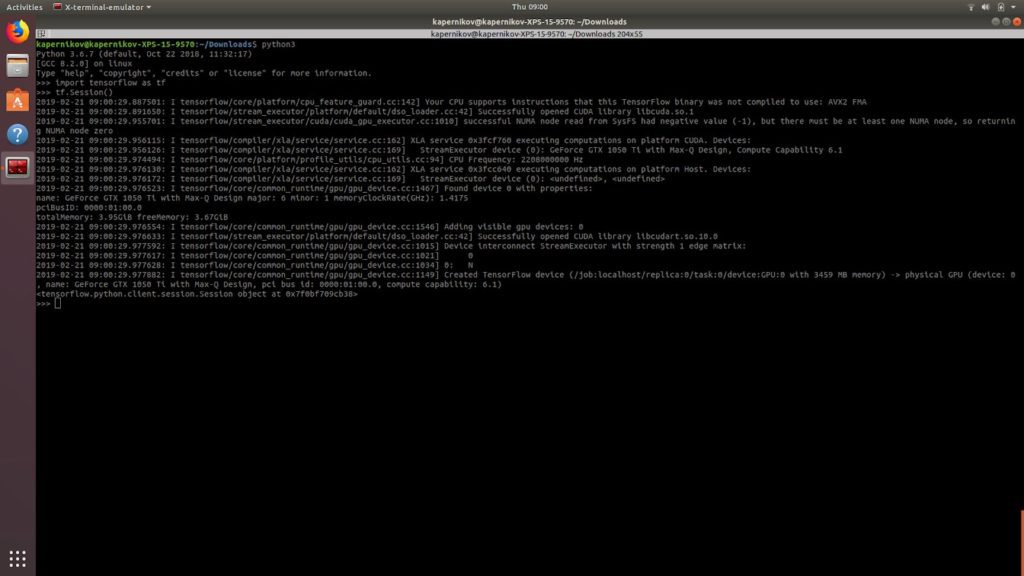
sudo pip3 install tensorflow-gpu keras jupyter matplotlib pandasTensorflow can be tested as follows: open a terminal and type:
python3
import tensorflow as tf
tf.Session()
This should show your GPU as device.
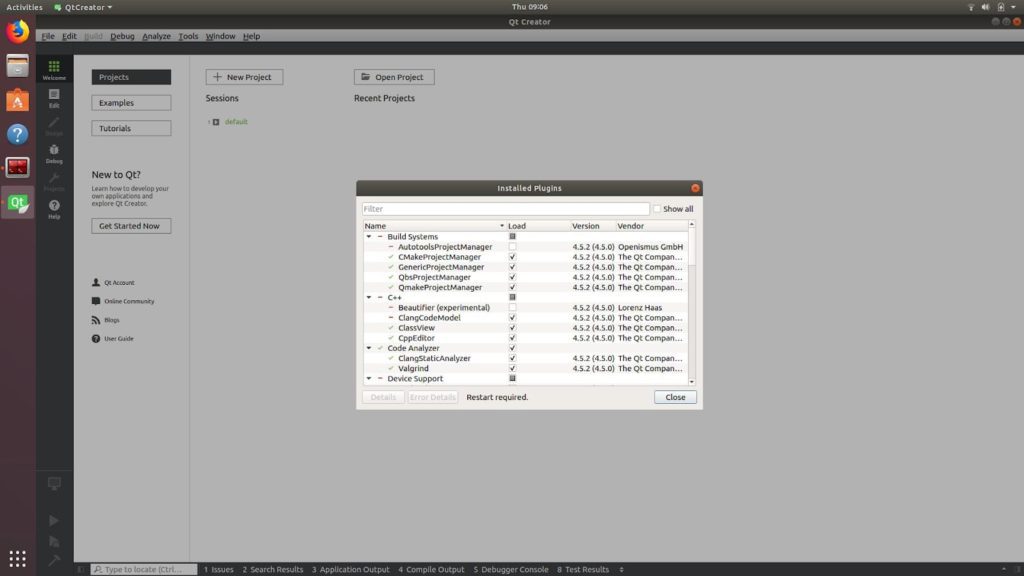
sudo apt install qtcreatorStart qtcreator