Interview with Zowi: AI for Marine Survey Data at GEOxyz
"We help GEOxyz survey the seabed efficien ...
Published on: October 7, 2018
This tutorial shows how to do object localization in an image for an object of known dimensions. We will be using Python 3 with SciPy and OpenCV 3.1 on an Ubuntu 16.04 desktop system.
Once you have logged on to your (new) Linux, open a terminal from the start menu.
Check whether you have Python 3 by typing in Python3 in the newly opened window.
You can also copy this and paste it in your terminal.
python3Exit Python by typing quit()
Then install SciPy.
sudo apt install python3-scipyIn your terminal
wget https://raw.githubusercontent.com/milq/milq/master/scripts/bash/install-opencv.shYou should get a message with saved to install-opencv.sh, if not, check your internet connection.
Next, type:
bash install-opencvWhen you get prompted for a sudo password, type in your user password you made during the Ubuntu installation.
Don’t worry if the install takes a couple of minutes. There should be text rolling down your screen.
During the tutorial, we make use of the pinhole camera model. This means that, if you want to use your own pictures, you need to know your camera matrix and distance coefficients. OpenCV has built-in functions to calculate these and an easy tutorial. We used these in our tutorial.
 camera_matrix = np.array(
        [[  6.62201661e+03,   0.00000000e+00,   1.09300820e+03],
           [  0.00000000e+00,   7.39754133e+03,   6.68477741e+02],
           [  0.00000000e+00,   0.00000000e+00,   1.00000000e+00]],'float64')
    dist_coeffs = np.array([  1.47718955e+00,  -1.32890661e+02,  -5.78854939e-02,
              1.54970815e-02,  -4.61317397e+00],'float64')
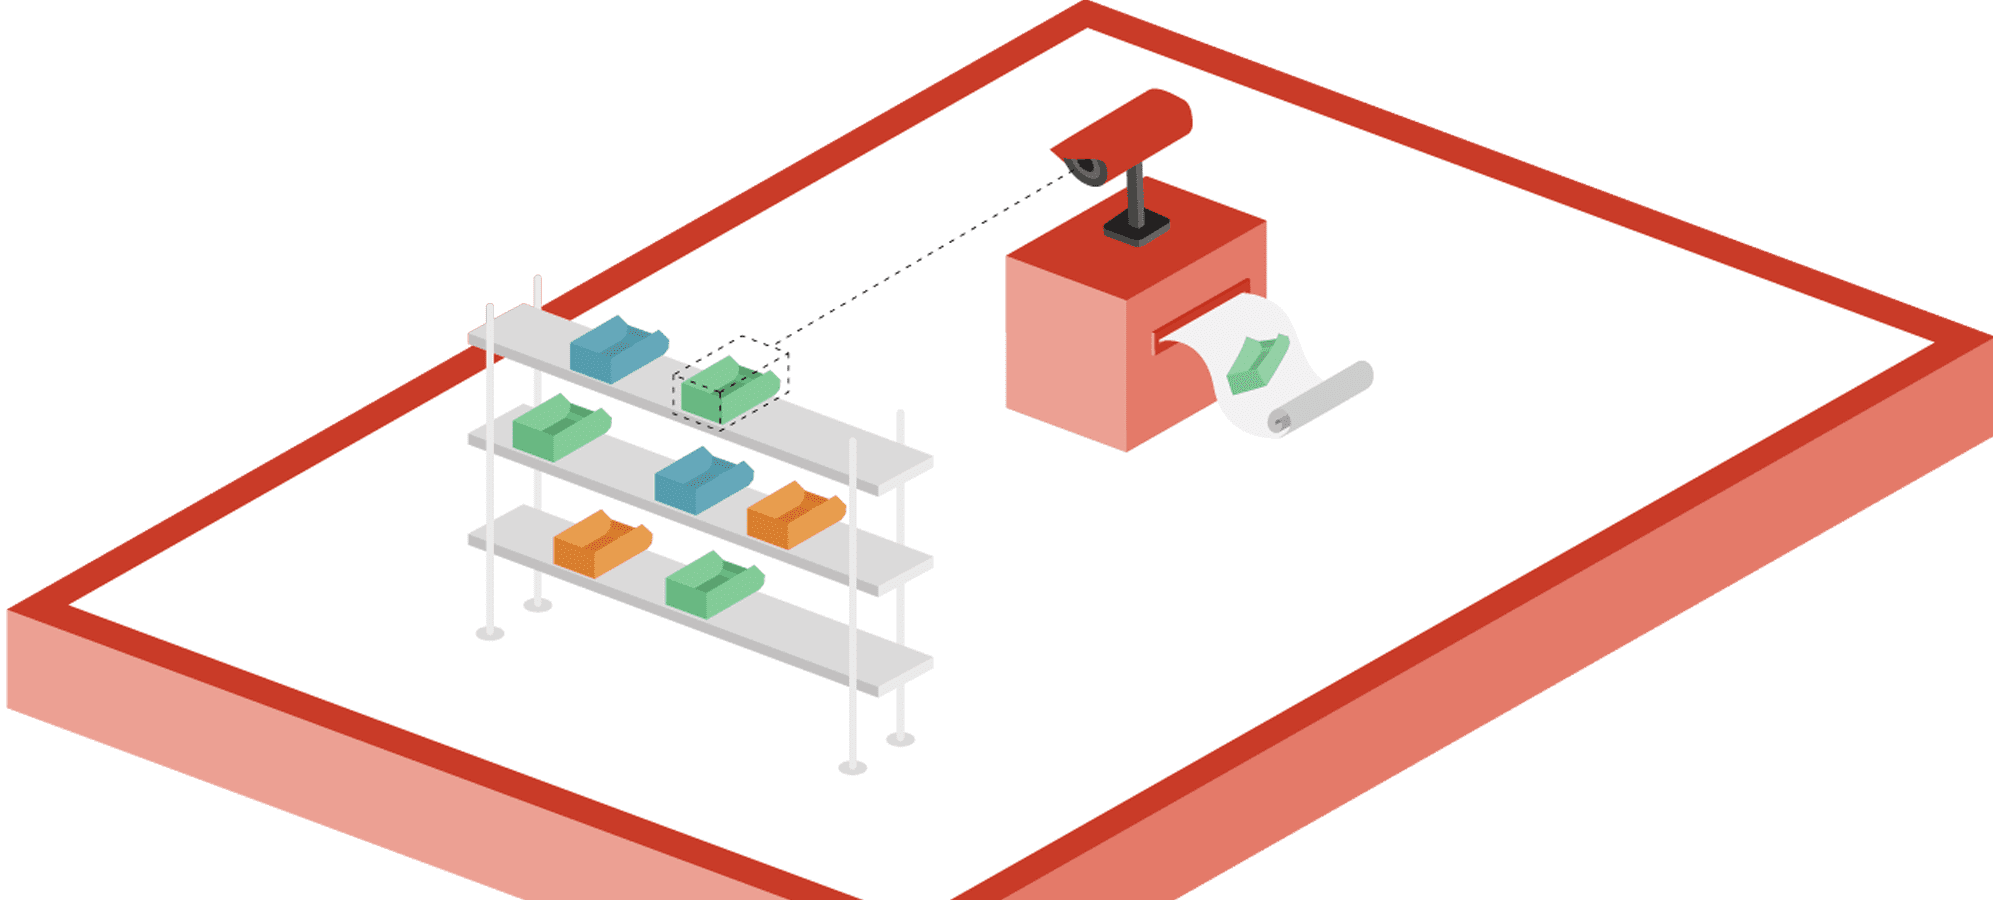
We want to locate the yellow picking bin. Therefore, we will first segment the image using color to detect our target the picking bin. Then we will use the pinhole camera model to project a model with known dimensions, fit it using pixel surfaces of the model and the target and the difference in overlap as metrics.
The first step is to segment the image. Here we will be using color to detect our target.
#import statements
import math
import numpy as np
import scipy.optimize
import cv2
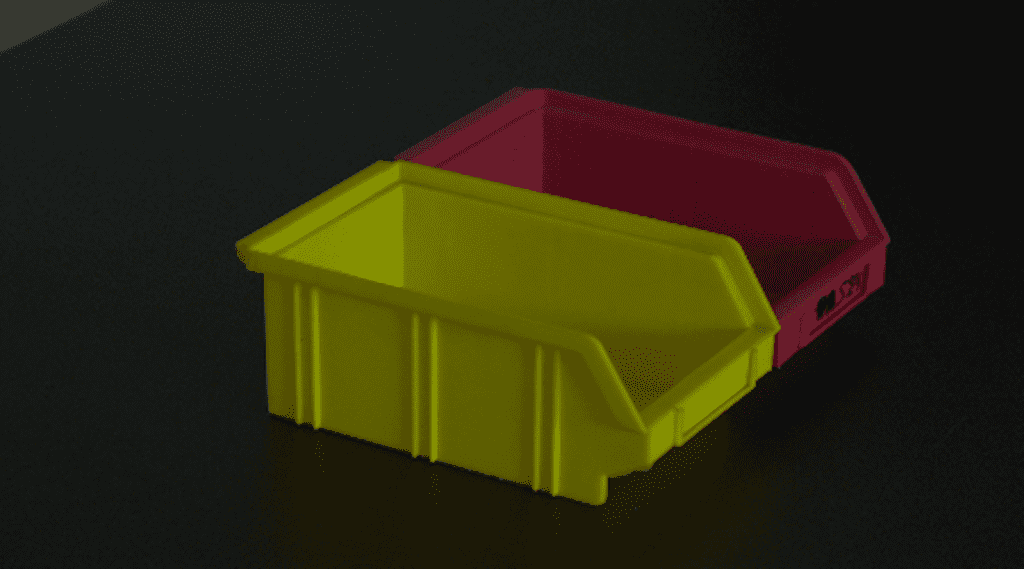
# Load captured image.
image_bgr = cv2.imread("box_location_input.png", cv2.IMREAD_COLOR)
# Convert to HSV color space.
image_hsv = cv2.cvtColor(image_bgr, cv2.COLOR_BGR2HSV)
# Mask box
YELLOW = {"lower":(25, 100, 50),"upper":(35, 255, 200)}
GREEN = {"lower":(64, 96, 64),"upper": (90, 255, 200)}
mask = cv2.inRange(image_hsv, YELLOW["lower"],YELLOW["upper"])
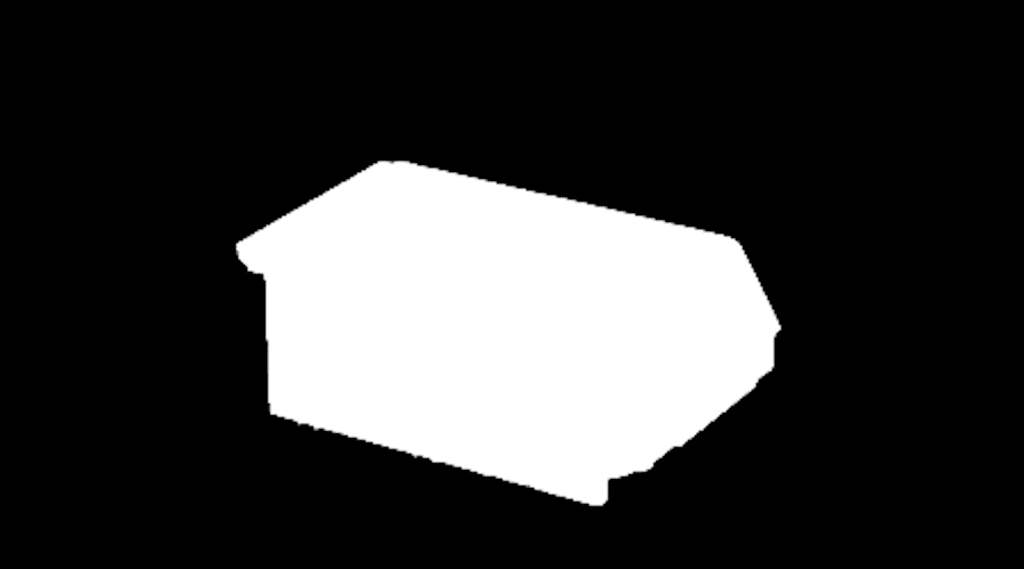
Object detection using color is a bit rudimentary. The next lines will smooth the mask using successive erosion and dilation operations. Finally, we grab the contours of the object, so we can draw them on our background image and make our final target mask we use to optimize.
mask = cv2.morphologyEx(
        mask, cv2.MORPH_OPEN,
        cv2.getStructuringElement(cv2.MORPH_ELLIPSE, (4, 4)))
    mask = cv2.morphologyEx(
        mask, cv2.MORPH_CLOSE,
        cv2.getStructuringElement(cv2.MORPH_ELLIPSE, (16, 16)))
    contours = cv2.findContours(
        mask, cv2.RETR_EXTERNAL, cv2.CHAIN_APPROX_SIMPLE)[1]
    contours = sorted(contours, key = cv2.contourArea, reverse = True)
    cv2.drawContours(image_bgr, contours, 0, (255, 255, 255), 3)
    targetmask = np.zeros((image_bgr.shape[0], image_bgr.shape[1], 1), np.uint8)
    cv2.drawContours(targetmask, contours, 0, (255), -1)
Our model will be a simple box of dimensions 150 mm x 100 mm x 75 mm. These are the dimensions of the real-life object. The 8 corners of the box are enough to make a projection in the image plane.
# box_size = [0.150,0.100,0.075]
def boxcorners(box_size):
    # Define box corners in box coordinate system.
    half_size_x = box_size[0] / 2.0
    half_size_y = box_size[1] / 2.0
    half_size_z = box_size[2] / 2.0
    corners = np.array(
        [[-half_size_x, -half_size_y, -half_size_z],
         [+half_size_x, -half_size_y, -half_size_z],
         [-half_size_x, +half_size_y, -half_size_z],
         [+half_size_x, +half_size_y, -half_size_z],
         [-half_size_x, -half_size_y, +half_size_z],
         [+half_size_x, -half_size_y, +half_size_z],
         [-half_size_x, +half_size_y, +half_size_z],
         [+half_size_x, +half_size_y, +half_size_z]],
        'float64')
    return corners
We need a few more parameters before drawing the model on an image. The rotation and translation vectors are where we want the model to appear. The camera matrix and distance coefficients are camera specific and need to be known in advance.
def drawBoxOnImage(rotation_vector, translation_vector,camera_matrix,dist_coeffs, image):
        # Draw the box on a given (color) image, given the rotation and
        # translation vector.
        box_size = [0.150,0.100,0.075]
        corners = boxcorners(box_size)
        # Project box corners to image plane.
        pts = cv2.projectPoints(
            corners, rotation_vector, translation_vector,
            camera_matrix, dist_coeffs)[0]
        # Draw box on image
        projected_image = image.copy()
        cv2.polylines(
            projected_image,
            np.array([[pts[1][0], pts[0][0], pts[2][0], pts[3][0]],
                      [pts[0][0], pts[1][0], pts[5][0], pts[4][0]],
                      [pts[1][0], pts[3][0], pts[7][0], pts[5][0]],
                      [pts[3][0], pts[2][0], pts[6][0], pts[7][0]],
                      [pts[2][0], pts[0][0], pts[4][0], pts[6][0]],
                      [pts[4][0], pts[5][0], pts[7][0], pts[6][0]]], 'int32'),
            True, (0, 255, 0), 3)
        return projected_image
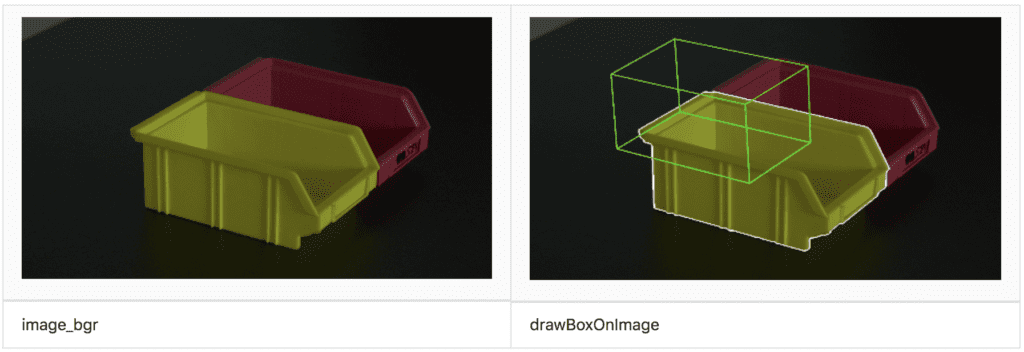
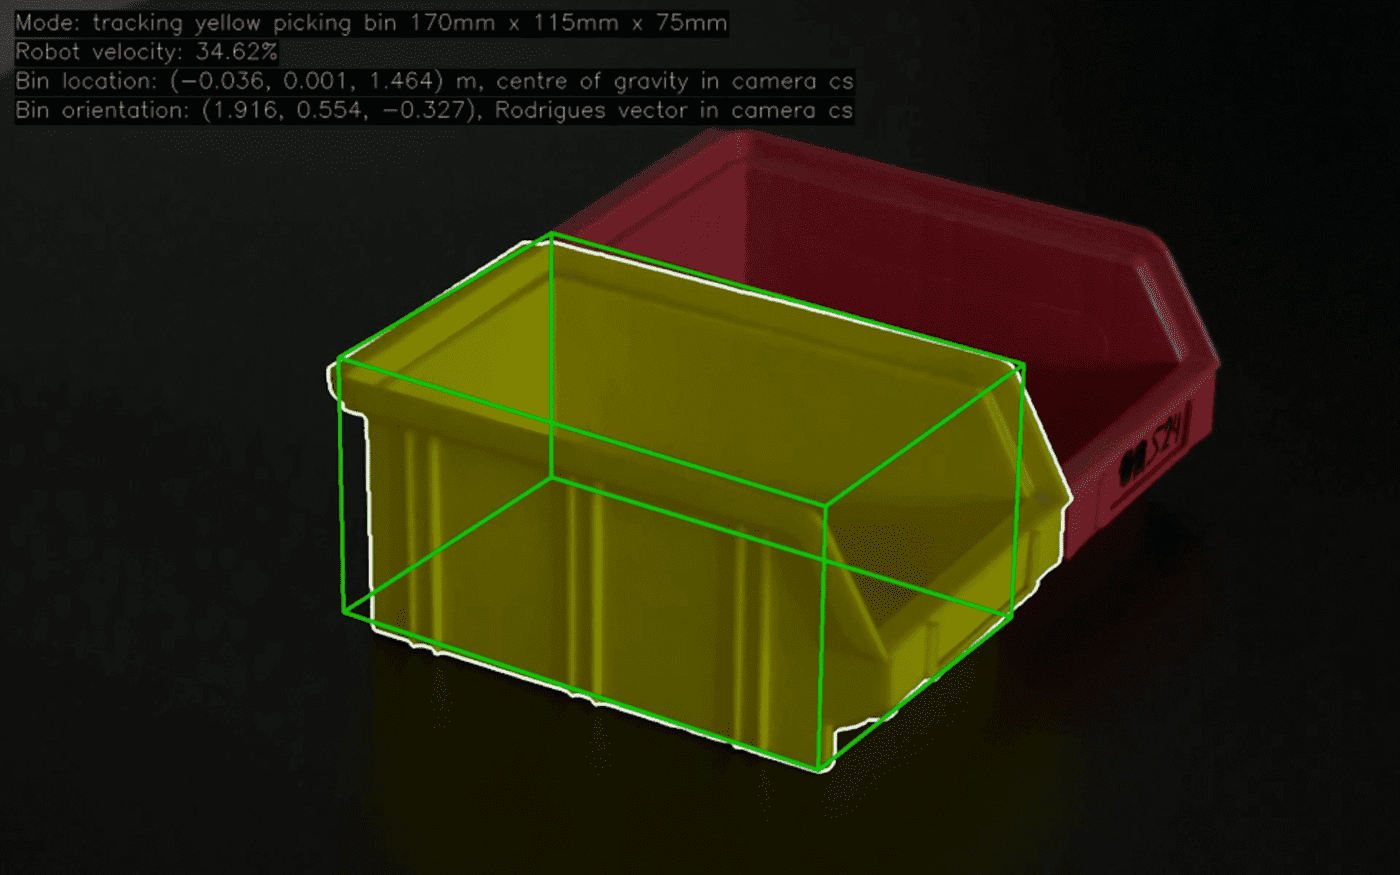
We estimated the rotation, but left the translation off target. Now comes the fun part: we will let the computer do the hard work of fitting the projected model to the yellow picking bin by using a SciPy optimizer.
The optimization doesn’t work on a wireframe model, but on a solid model.
def projectBox(rotation_vector, translation_vector,camera_matrix,dist_coeffs, image):
        # Project the box to create a mask, given the rotation and translation
        # vector. This function is used in the optimisation loop to compare the
        # projection using the rotation and translation vectors to the original
        # image.
        box_size = [0.170,0.115,0.075]
        corners = boxcorners(box_size)

        pts = cv2.projectPoints(
            corners, rotation_vector, translation_vector,
            camera_matrix, dist_coeffs)[0]
        # Draw box on image
        projected_image = np.zeros((image.shape[0], image.shape[1], 1),
            np.uint8)
        cv2.fillConvexPoly(
            projected_image,
            np.array([pts[1][0], pts[0][0], pts[2][0], pts[3][0]], 'int32'),
            (255))
        cv2.fillConvexPoly(
            projected_image,
            np.array([pts[0][0], pts[1][0], pts[5][0], pts[4][0]], 'int32'),
            (255))
        cv2.fillConvexPoly(
            projected_image,
            np.array([pts[1][0], pts[3][0], pts[7][0], pts[5][0]], 'int32'),
            (255))
        cv2.fillConvexPoly(
            projected_image,
            np.array([pts[3][0], pts[2][0], pts[6][0], pts[7][0]], 'int32'),
            (255))
        cv2.fillConvexPoly(
            projected_image,
            np.array([pts[2][0], pts[0][0], pts[4][0], pts[6][0]], 'int32'),
            (255))
        cv2.fillConvexPoly(
            projected_image,
            np.array([pts[4][0], pts[5][0], pts[7][0], pts[6][0]], 'int32'),
            (255))
        # Return projected image.
        return projected_image
We are going to minimize the difference between the surface covered by our projected model and the surface of our target mask. Picture a xyz coordinate system in the image. The projected model can then be rotated and translated along the axes until it fits the target mark.
image_pixels = float(cv2.countNonZero(targetmask))
def objectiveFunction(x):
    # The objective function for the optimisation. Split the x input vector
    # in a rotation and a translation vector, project the box and measure
    # the difference between the projection and the given mask (COG
    # distance, total pixel count (surface) and non-overlapping pixel count
    # (shape difference).

    # Get rotation and translation vectors and project perfect box.
    rotation_vector = np.array([x[0], x[1], x[2]], 'float64')
    translation_vector = np.array([x[3], x[4], x[5]], 'float64')
    projected = projectBox(rotation_vector, translation_vector,camera_matrix,dist_coeffs,
            np.zeros(targetmask.shape, np.uint8))

    # Calculate size difference (pixel count).
    projected_pixels = float(cv2.countNonZero(projected))
    pixel_count_difference = \
        ((projected_pixels - image_pixels) / image_pixels) ** 2

    # Calculate overlap difference (pixel count).
    non_overlap = cv2.bitwise_xor(targetmask, projected)
    non_overlap_pixels = float(cv2.countNonZero(non_overlap))
    overlap_difference = non_overlap_pixels / self.image_pixels

    # Return penalty.
    return pixel_count_difference + overlap_difference
All set, let the optimization begin.
result = scipy.optimize.minimize(
        objectiveFunction,np.hstack([rotation, translation]),
        method='Nelder-Mead')
x = result.x
The outcome of the optimization is the rotation and translation vector we should use to project our model to fit the yellow picking bin in the image. These vectors also tell us how far the yellow picking bin is removed from the camera in real life.